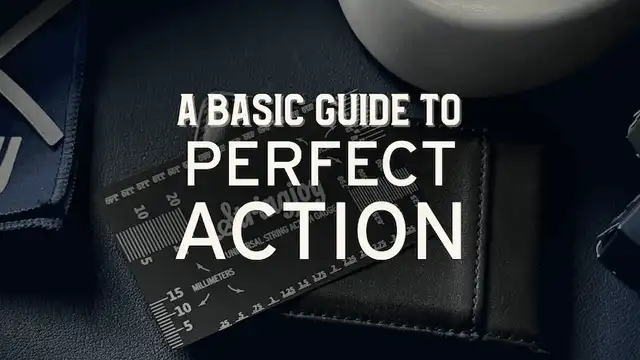
Guitar Action Explained: What It Is, Why It Matters, and How to Find Your Perfect Setup

When it comes to guitars, "action" doesn’t involve explosions, car chases, or slow-motion hero shots. In fact, guitar action might be one of the least glamorous topics in the guitar world.
But it’s also one of the most important.
If your guitar feels hard to play, buzzes unexpectedly, isn't agreeing with your fingers, or just doesn’t respond the way you want it to, the culprit is often your guitar’s action. And sometimes a tiny adjustment can make the difference between an instrument that fights you and one that feels effortless.
In this guide, we’ll break down everything you need to know about guitar action—what it is, why it matters, what parts of the guitar affect it, and how to dial in the setup that works best for you.
What Is Guitar Action?
In the world of musical instruments, the term action generally refers to how an instrument responds to the player.
For example, on a piano, action describes the feel and responsiveness of the keys under your fingers. On guitar, the word has a more precise meaning.
Guitar action refers to the height of the strings above the frets.
That’s it!
If the strings sit close to the fretboard, the guitar has low action. If they sit farther away, it has high action.
This distance determines how far you have to press a string to fret a note. And because that motion is the foundation of nearly every technique in guitar playing, action has a massive impact on how the instrument feels.
It also affects something many players don’t immediately realize: tone.
Why Guitar Action Matters
The height of the strings above the fretboard doesn’t just change how a guitar plays—it also influences how it sounds.
Action affects:
- Playability and comfort
- Note clarity and sustain
- The likelihood of fret buzz
- How aggressively the guitar can be played
When strings sit too high, the guitar can feel stiff and difficult to play. When they sit too low, they may vibrate against nearby frets, producing the dreaded fret buzz.
Finding the right balance is key.
Players who strum aggressively often need slightly higher action to give strings more clearance to vibrate freely without hitting other frets. On the other hand, players focused on speed or technical passages often prefer lower action for easier fretting.
Because of this, the “perfect” action varies from player to player.
High Action vs Low Action
There’s no universal setting that works for every guitarist. Instead, choosing the right action means understanding the trade-offs.
Let’s break down the pros and cons.
High Guitar Action
As described, with high action, the strings sit farther away from the fretboard. The biggest benefit of higher action is clarity. When strings have more room to vibrate, they’re less likely to collide with other frets. The result is cleaner notes and chords that ring clearly.
Higher action also allows for more aggressive playing. If you're the kind of player who digs into the strings with heavy strumming or powerful picking, higher action helps prevent buzzing.
The downside to higher action is that it requires more effort to play. Because the strings are farther away from the frets, your fingers have to fight more tension to produce cleanly fretted, clear, rounded notes.
That can lead to hand fatigue or slower playing, and for many players, that's a deal-breaker.
Low Guitar Action
With low action, the strings are lower to the fretboard. Since your strings are that much closer to the frets, it requires less effort to play. This is one reason fast players and shredders often prefer low action—it helps facilitate speed and fluidity.
On the other side, lower action increases the likelihood of fret buzz. As strings vibrate, they may touch nearby frets. Sometimes this buzz is obvious, but other times it subtly reduces sustain without producing a clearly audible buzz.
Interestingly, players who rely on distortion often tolerate lower action because the extra sustain from their amp helps mask these effects.
Clean players, however, usually need slightly higher action to keep notes ringing clearly.
Why Acoustic and Electric Guitars Have Different Action
You may notice that acoustic guitars typically have higher action than electric guitars.
There are a few reasons for this, the most obvious being that acoustic guitars don't produce the same kind of amplified output as electrics. An electric guitar's pickups capture vibrations of the strings themselves, and micro amounts of fret buzz may not be "picked up" in a way that'd make them noticeable through an amp.
Meanwhile an acoustic guitar is designed to transmit sound directly. That means its voice is completely exposed without any "processing" by pickups or amps, and every vibration – including buzzing – may be audible.
And since acoustics do indeed provide their own projection, they are often played more aggressively. Strong strumming produces wider string vibrations, which means the strings need more room to move without buzzing.
Because of these differences, electric guitars can often be set significantly lower—sometimes as much as .05" to .15" lower than acoustics.

How to Check Your Action
Now that we understand what action is, let's find out what kind of action you're working with. With just a couple of tools, measuring your action is a breeze.
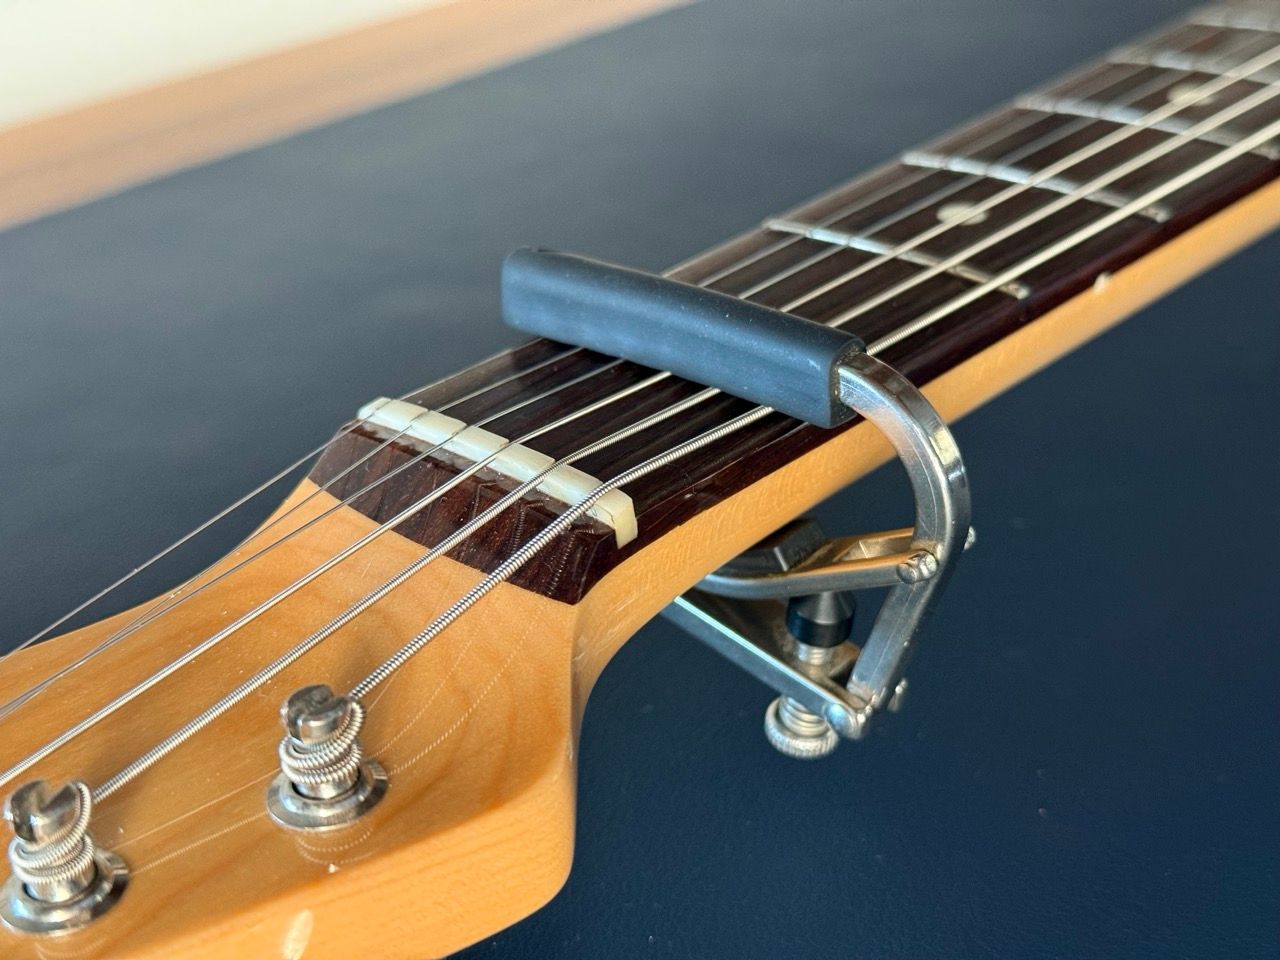
First Fret's First – Grab a Capo
This is important, and it relates to the order of operations in a guitar setup. Before all else, you've got to make sure your guitar's nut is cut properly.
The nut is one of the components that affects string height, and if its slots are cut too high or too low, it can distort action measurements.
Now, we don't recommend making adjustments to your nut on the fly, and you shouldn't really have to unless you're making a big switch in string gauge or want to dramatically change your playing experience. Since the nut is so essential, we usually suggest seeking assistance from an experienced tech when it comes to nut-related issues.
However, insofar as measuring your action is concerned... We want to assume that your nut is dialed in properly and remove it from the equation completely.
How can we do that?
By using a capo on the 1st fret when measuring guitar action, you’re disregarding the nut and directly measuring the relationship between the strings, the frets, and the bridge with perfect accuracy. This effectively isolates the parts of the setup that typically control action—namely the neck relief and saddle height.
It also helps diagnose problems. If the guitar feels much easier to play with a capo on the first fret, the nut slots may be too high. Using a capo ensures consistent, reliable measurements, making it easier to dial in a precise setup.
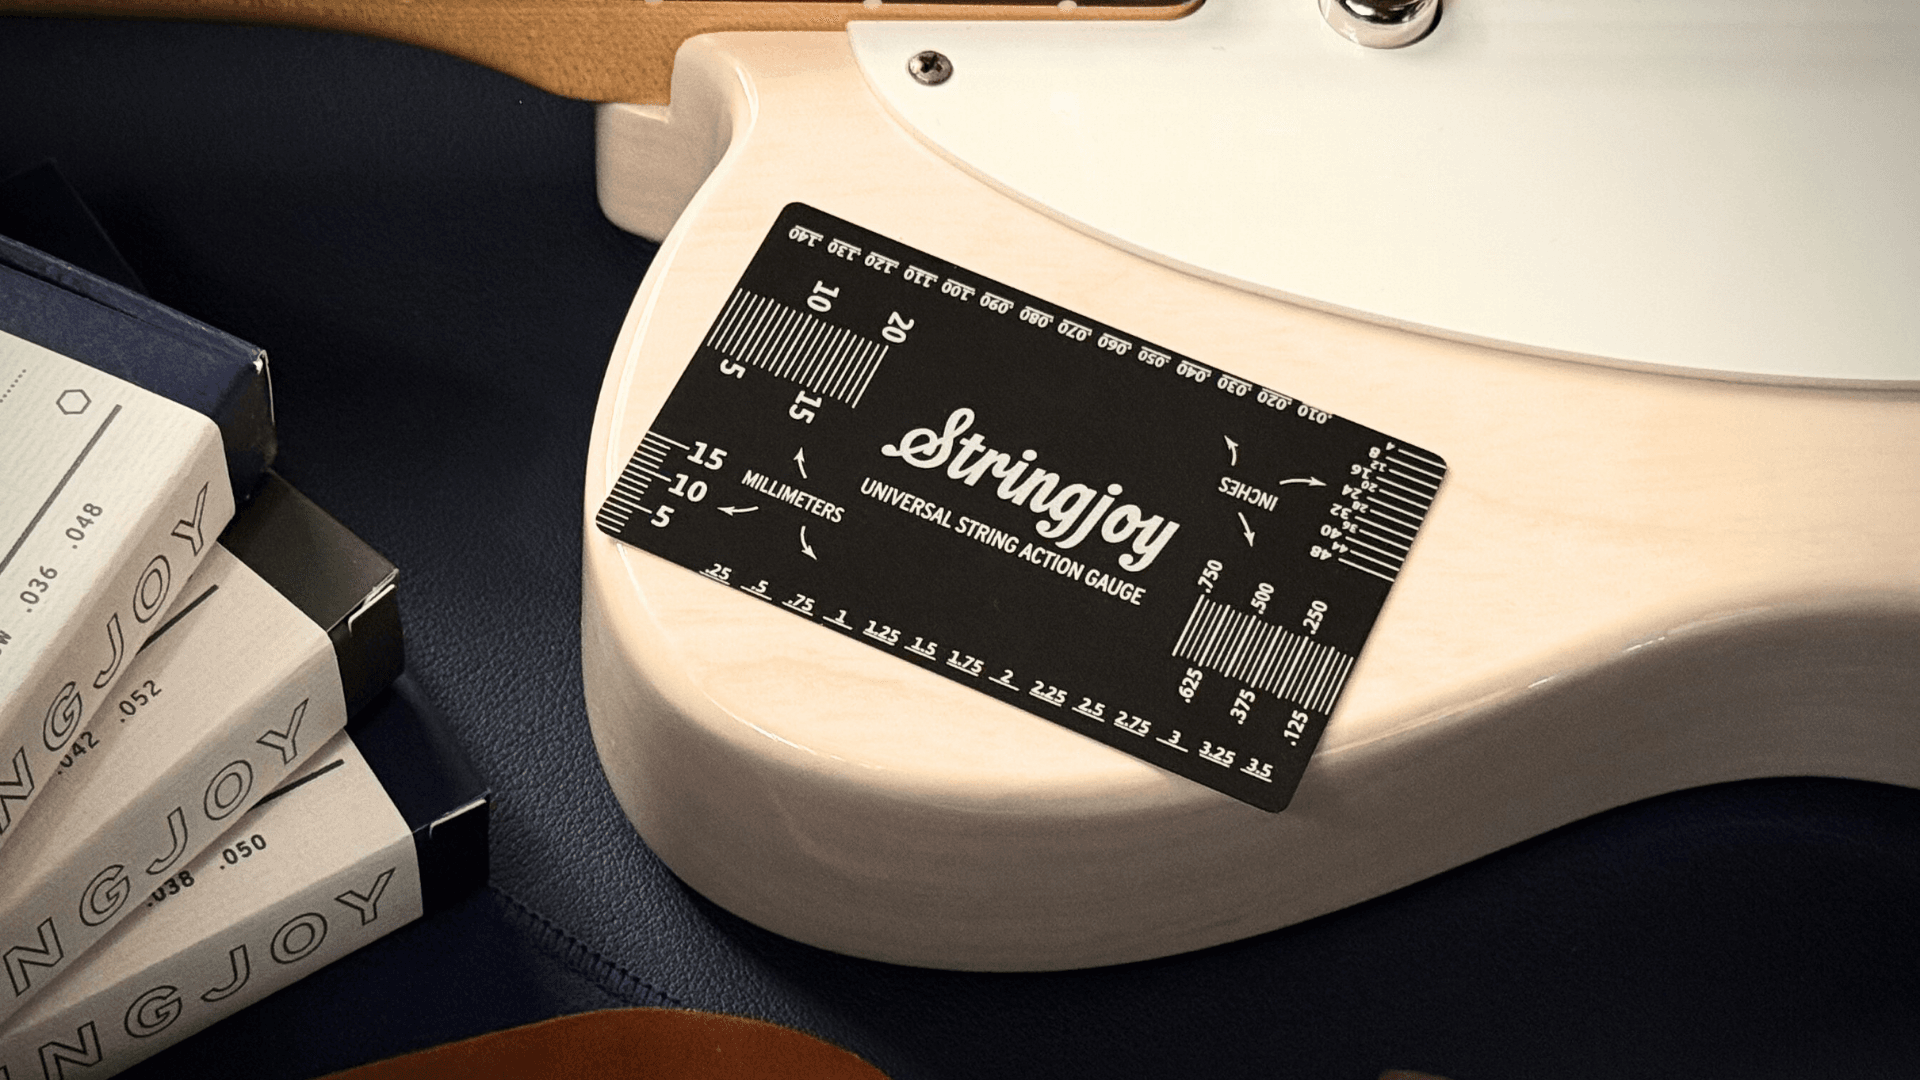
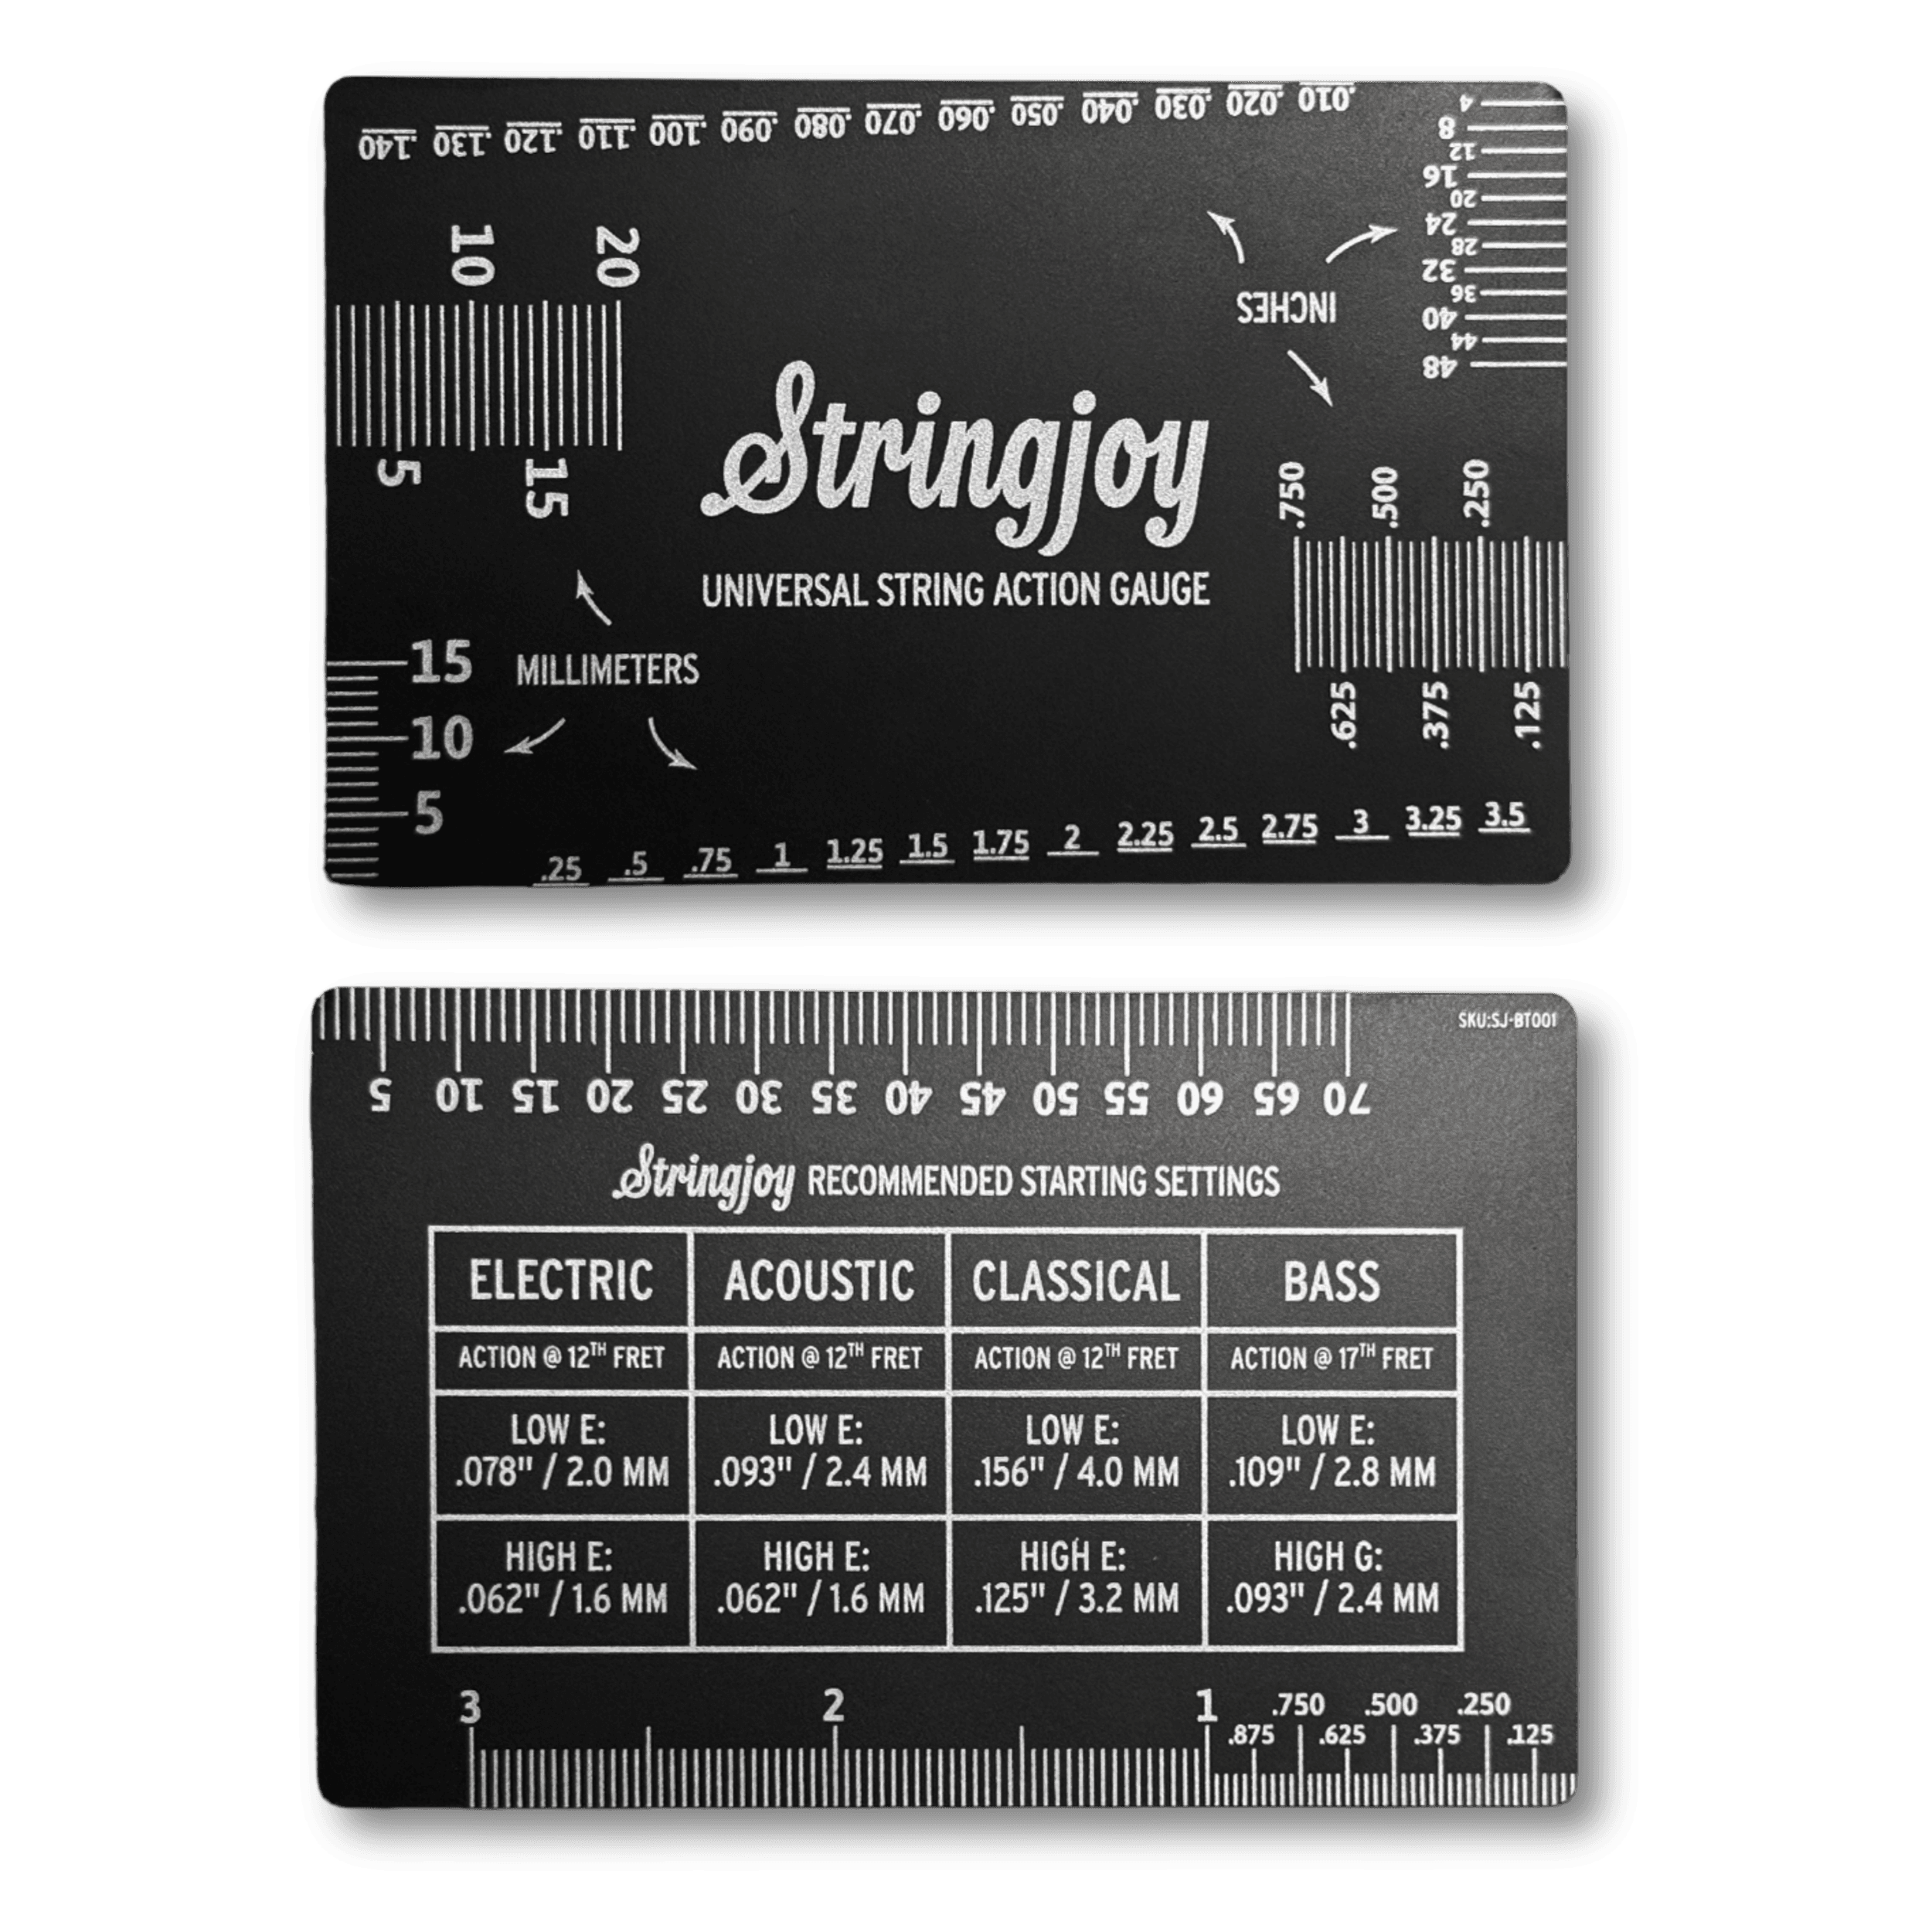
Tools for Measuring Guitar Action
In addition to a capo, if you want to measure your guitar’s action accurately, you’ll need a simple measuring tool.
Some common options include:
- Small ruler
- Feeler gauges
- String action gauge
Among these, a string action gauge is the most convenient and precise. They're compact and designed specifically to allow you to quickly measure string height at the 12th fret and compare it to recommended ranges.
For players who enjoy tweaking their setups—or simply want to understand how their guitar is configured—a string action gauge is one of the most useful tools you can own.
And fortunately, they’re inexpensive and easy to use.

Taking the Measurement
Capo on 1st and gauge in hand... the rest is pretty easy!
You'll be looking at the 1st string (high E) and 6th string (low E), and measurements are taken up at the 12th fret.
Simply measure the distance between the bottom of the string and the top of the 12th fret at the 12th fret.
Place the gauge directly on top of the fret (perpendicularly) measure the gap to the bottom of the string.
That's your action!
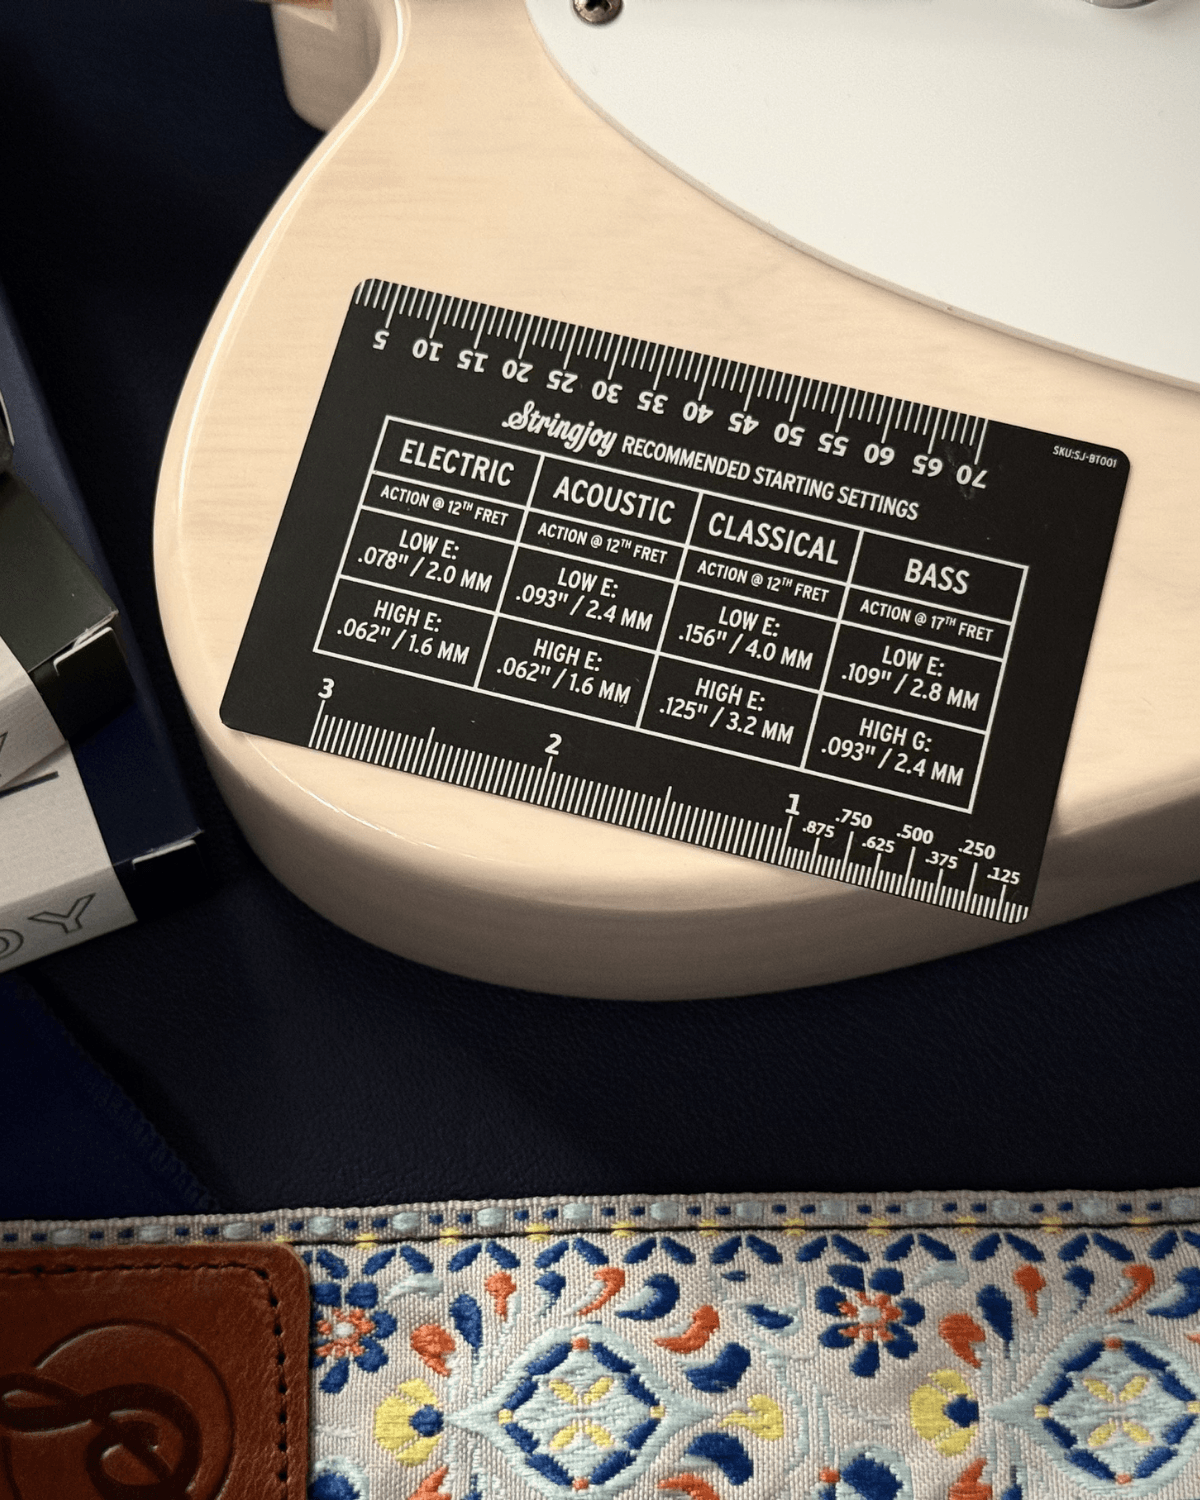
Typical Guitar Action Measurements
While every guitar is different, we've sourced some recommended starting points from top techs in the industry that work great for many players:
Electric Guitar Action (12th fret)
- Low E/Bass side: .078" (2.0 mm)
- High E/Treble side: .062" (1.6 mm)
Acoustic Guitar Action (12th fret)
- Low E/Bass side: .093" (2.4 mm)
- Treble side: .062" (1.6 mm)
Remember, these are guidelines, not strict rules. Players who strum aggressively may prefer slightly higher action, while players who use a lighter touch might go lower.
How String Gauge Affects Action
Don't forget: string gauge also affects action.
Heavier strings operate under higher tension and vibrate less widely than lighter strings.
Because of this, heavier strings can often sit closer to the frets without buzzing.
Lighter strings, on the other hand, vibrate more widely and may require slightly higher action to avoid fret buzz.
So if you switch from light strings to heavy ones—or vice versa—you may need to adjust your action accordingly.
But...how?
The Three Main Ways to Adjust Guitar Action
If your guitar’s action needs adjustment, there are three main components that affect string height.
1. Adjusting the Bridge or Saddles
The bridge saddles are usually the easiest place to start.
On many electric guitars—especially Fender-style bridges—each saddle can be adjusted individually with a small Allen wrench.
This allows precise control over each string’s height.

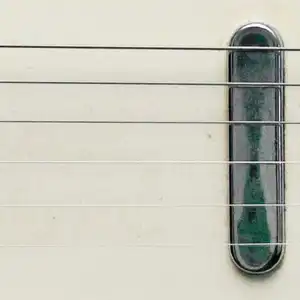
Gibson-style bridges work slightly differently. Instead of adjusting each string individually, you raise or lower the bass or treble side of the bridge.
Acoustic guitars are a bit more complicated. Adjusting saddle height usually involves removing the saddle and either sanding it down or adding a shim. Because of this, many players prefer to have acoustic adjustments done by a professional.

2. Adjusting the Truss Rod
We could write a whole other article about the history and virtues of the truss rod. For now, all you need to know is that it's a metal rod inside the neck of the guitar that counteracts string tension.
Without it, the tension from the strings would eventually cause the neck to bow forward, making the guitar unplayable.
By tightening or loosening the truss rod, you can adjust the curvature of the neck. This indirectly affects string height across the entire fretboard.
In most cases, the ideal neck has a very slight forward bow—just enough to allow the strings to vibrate freely.
Seasonal changes often affect neck relief. Humidity and temperature can cause wood to expand or contract, meaning occasional truss rod adjustments are normal.
Often, a quarter turn is enough to restore proper action.
Action-Packed
The strings and accessories that'll have your guitar singing
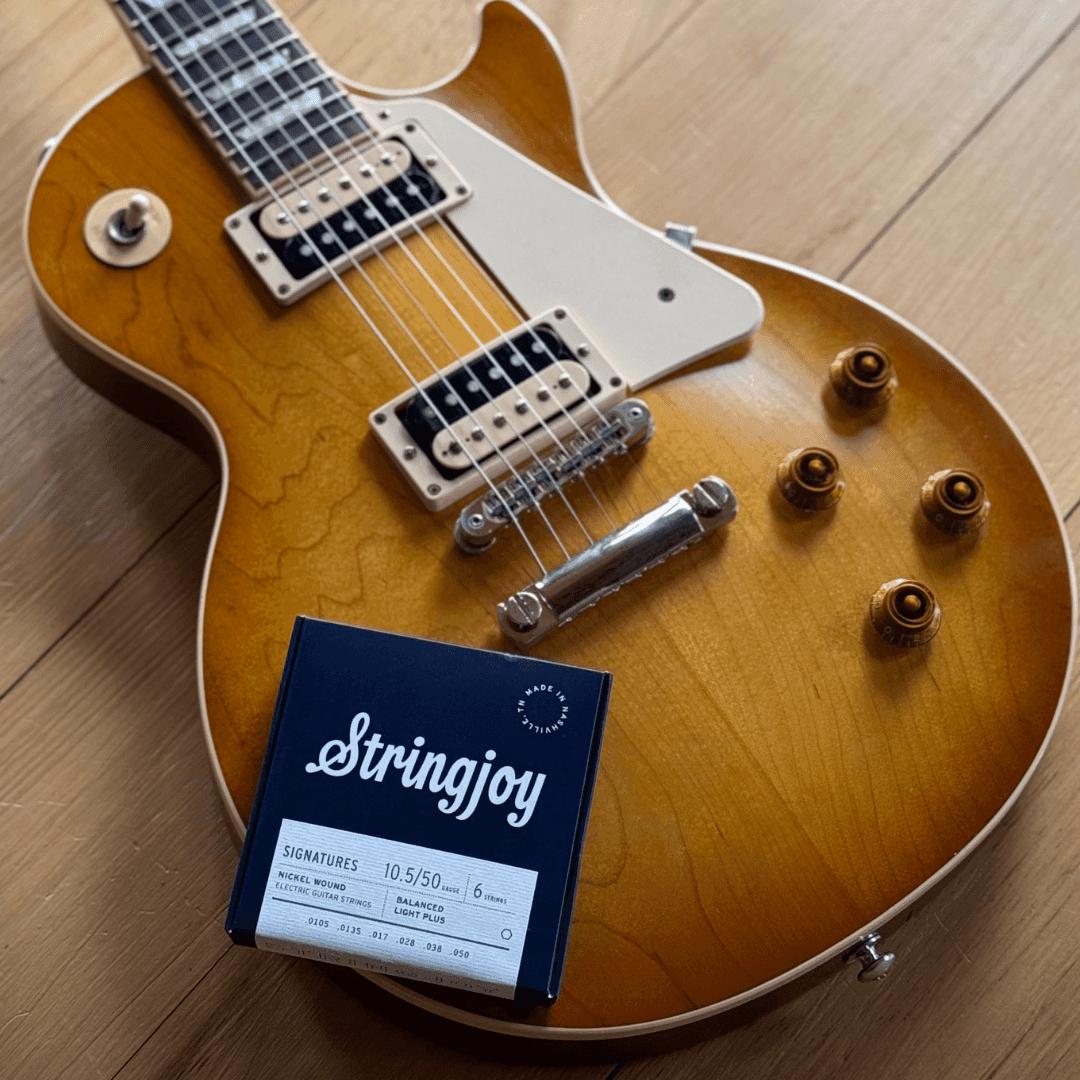
Stringjoy Universal String Action Gauge

Stringjoy 10-48 Balanced Light Gauge Signatures - Nickel Wound Electric Guitar Strings

Stringjoy 12-54 Light Gauge Foxwoods - Coated Phosphor Bronze Acoustic Guitar Strings
Stringjoy Lester Vintage Woven Guitar Strap

Stringjoy Twill Dad Hat

Stringjoy 11-52 Super Light Gauge Naturals - Phosphor Bronze Acoustic Guitar Strings

Stringjoy Natural Guitar String Conditioner & Microfiber Cleaning Cloth Bundle

Stringjoy 9.5-46 Balanced Super Light Plus Gauge Orbiters - Coated Nickel Electric Guitar Strings
3. Adjusting Nut Height
The nut is channels strings between the fretboard and the headstock.
While it plays a role in action—particularly in the lower frets—it’s usually not the first place we want to adjust.
Nuts rarely shift significantly during regular use. However, over the years they can wear down or require replacement.
If your action problems persist even after adjusting the bridge and truss rod, the nut might need attention.

How to Find Your Ideal Guitar Action
Because every player is different, finding the right action is a matter of experimentation.
Here’s a simple approach.
Start With Standard Measurements
Use common setup recommendations as a baseline to give yourself a reasonable starting point.
Adjust Gradually
Make small adjustments to the saddles and test the guitar after each change. Tiny adjustments can make noticeable differences.
Play Your Usual Style
Your action should match the way you actually play.
If you strum aggressively, test your setup that way. If you play light fingerstyle or fast leads, make sure the guitar responds comfortably in those contexts.
When to Find a Guitar Tech
While many guitarists enjoy learning how to adjust their own setups, it’s perfectly fine – and often recommended – to let a professional handle it.
The good news is that action adjustments are usually simple and inexpensive for experienced guitar techs.
Even if you never plan to adjust your guitar yourself, understanding action is still incredibly valuable.
Knowing how action affects playability and tone will help you communicate your preferences clearly, ensuring your guitar feels exactly the way you want.
Final Thoughts
Guitar action might not be the most thrilling topic in the world—but it’s one of the most powerful ways to improve how your instrument plays.
A well-dialed setup can:
- Make your guitar easier to play
- Improve tone and sustain
- Reduce fatigue while practicing
- Help your instrument match your playing style
And best of all, adjusting your action is usually simple, inexpensive, and sometimes even free if you do it yourself.
Whether you decide to experiment on your own or bring your guitar to a trusted tech, dialing in your action is one of the smartest things you can do for your instrument—and your playing.
Other Posts you may like


Guitar Strings Order: How the Guitar is Tuned and Why

Two Handed Tapping: Our Top 8 Tappers of All Time

Which Guitar Strings Wear Your Fret Wire Down More?
What is Nashville Tuning? Its History, Best Guitar Strings & Uses

Guitar Scale Length Explained: String Tension & Playability
What Guitar Strings I Used To Play...
0 Responses
Leave a Reply
Your email address will not be published. Required fields are marked *


